 One of my favorite things is making seasonal decorations for my house, as well as for friends and family.
I find that most people have plenty of decorations for major holidays — such as Fourth of July or Christmas — but many people do not have decorations for other seasonal festivities.
The reason for this could range anywhere from lack of money to decorate year round to the person or family just not having enough time to decorate.
This is where you, the creative friend or family member, comes in!
After all, you found this article, and there are caboodles of similar tips for making fun seasonal crafts on this site. So take note and make someone close to you smile this holiday season!
Following are the steps I used to make this spooky Halloween gift idea. The best part is, you could adapt this same idea to make any type of seasonal craft for any time of year…
The first thing you need to do is have plenty of supplies on hand.

Choose Your Colors
I decided on a color palette for Halloween that was not traditional orange and black.
I usually tend to think along the lines of the holiday’s traditional ideas, and then I put a little twist on the colors.
For instance, when I think of Halloween I think of the outdoors. What colors are good for outdoors? I chose Clover Meadow (green) and Twilight (blue) and then thought of the moon and went with Sunflower (Yellow) and had to tie it all in with Black and Gray (think night and tombstones).
Decide On Embellishments
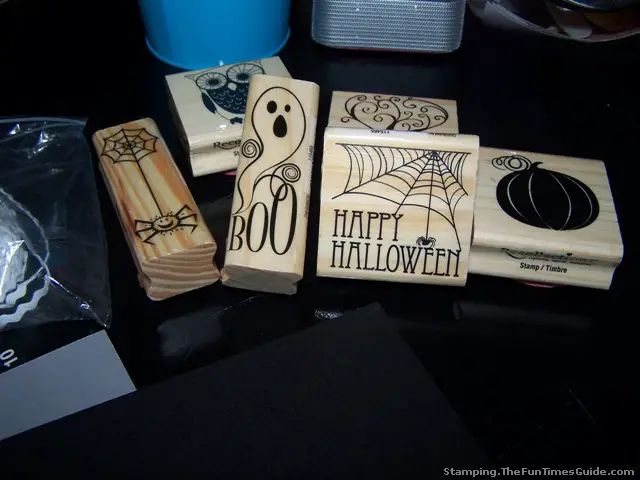
Next, I chose the embellishments and stamps that I wanted to use for this craft project.
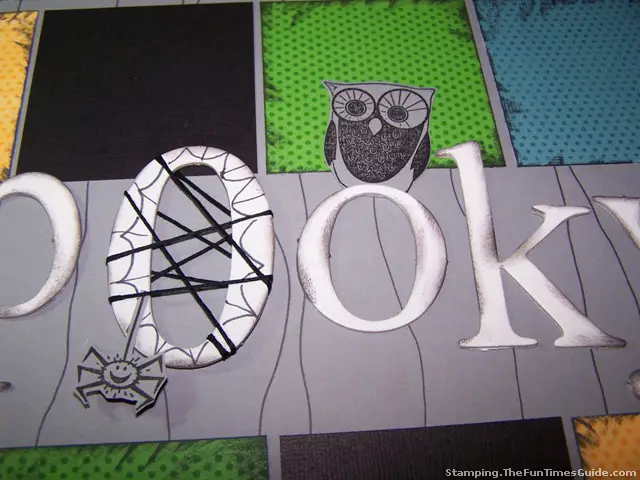
I found chipboard letters that spell Spooky, plus some Halloween stamps that are images of an owl and a spider. I got those stamps at Michaels in the $1 bin. (Is that a great steal or what?!)
I also used black embroidery floss for the spider web and yellow felt stars to denote night time.
Preparing The Background Cardstock
 I took my 12×12 gray cardstock and randomly drew lines from the top to the bottom — you can use as many or as few as you want to.
Then, I took a sponge (a foam tool would also work) and sponged the edges in black ink. You can do this as much or as little as you want to.
Next, I used my paper trimmer to cut each piece of colored cardstock into squares measuring 2-¾ x 2-¾. I cut 3 of each color.
I then chose a stamp that was polka dots and stamped each square in the same color ink as the paper — to give the layout dimension.

Finally, I sponged each square directly with the ink pads. Or, you may want to use a foam texture tool and go around all the edges instead.
Laying Out The Design
 Next, I laid out my squares where I wanted them and glued them to the paper. I tend to do this without being too precise, but you can always use a grid-lined cutting mat to line it up perfectly if you wanted.
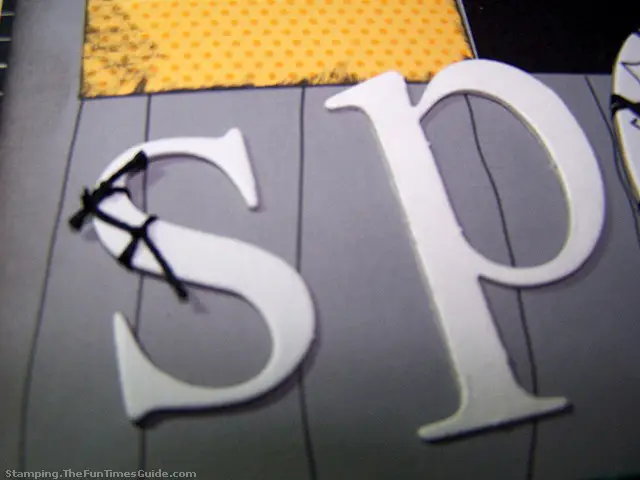
Then comes the chipboard letters…
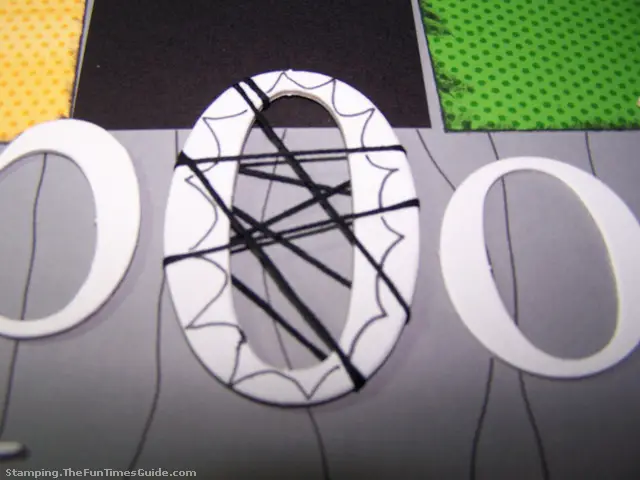
I took the “S” and tied 2 small pieces of embroidery floss to it. I then took the floss and randomly wrapped the first “O” and then tied a knot behind the letter. Next, I took a marker and drew more web lines on the “O”.
The final thing I did to the chipboard letters was to sponge them with black ink. Again, you can do this is as much or as little as you like.
Adhere All Of The Embellishments
For my final part of this project, I embellished the layout.
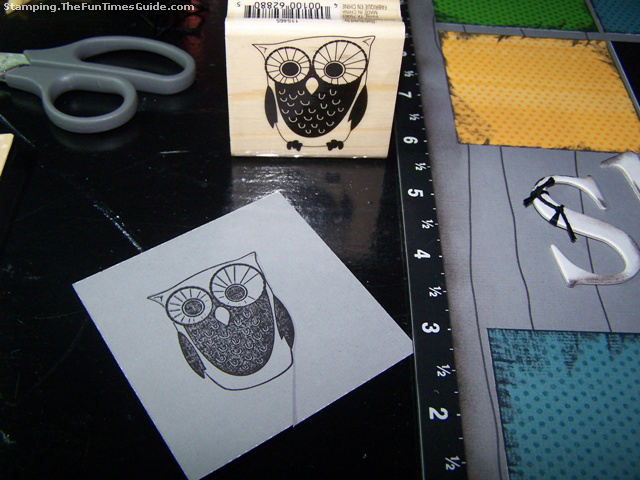
I stamped the owl and the spider onto scrap pieces of gray cardstock, and then used pop dots to adhere the owl onto the second “O”. This gives it a raised, 3-dimensional effect.
For the spider, I used Liquid Glass adhesive to adhere him to the first “O”.
The tombstones are made from scrap pieces of paper. They are simply freehand cut to look like a stone.
The ghost is a sticker from the $1 bin at Michaels, as well.
I used Liquid Glass to adhere the felt stars to the page and also to adhere the “Spooky” letters to the layout.
Finally, I took a black marker and drew some grass on the bottom squares — to kind of give it the graveyard feel.
The Finishing Touches
The only thing left to do was to punch 2 holes in the middle of the first and last square and tie the hanging ribbon to the layout.
I used a Crop-A-Dile to punch my holes.
I used white daisy ric rac ribbon and tied a double knot after threading each hole.
Adapting This Idea For Other Holidays
Well, I hope you enjoy this project as much as I did.
Maybe you can put a fun twist on this and make one for Christmas (advent calendar maybe?) or for Easter (make it look like a basket). Anything goes when you are being creative!
One more thing you could add to this project would be pictures onto some of the squares. If you do so, you should cut them to 2-½ x 2-½.


