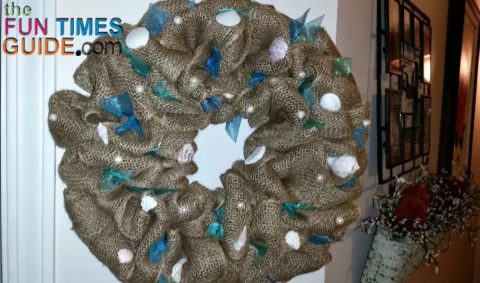
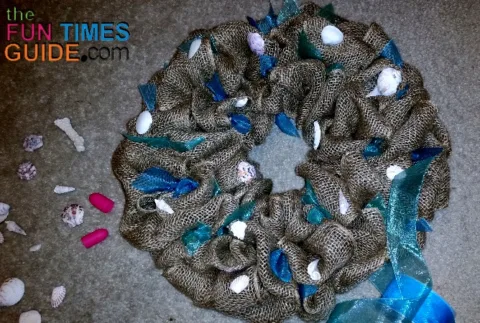
As a thank you gift for relatives hosting me in their Florida beach house, I wanted to make a burlap wreath suitable for their home décor.
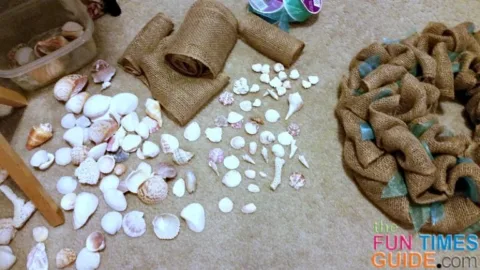
I had extra seashells collected on their beach last year, so I used those on the wreath.
Here are my best tips for making a burlap wreath yourself…
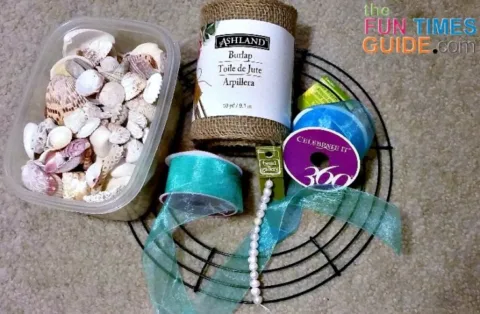
Burlap Wreath Supplies
- If you don’t have any shells on hand, then you’ll need to buy seashells at a craft store or dollar store.
- Find a metal wreath frame that is about half the size of your desired wreath. I’ve learned that once the loops and decorations have been added, the wreath can get very big – so I like to use a smaller 12-inch wreath frame.
- I used 5-inch wide burlap. I ended up needing about 15 yards of it for this burlap wreath.
How To Wrap The Wreath Frame With Burlap
#1 – To start, secure an end of the burlap to the wreath frame. You can do this by tying a knot or use floral wire.
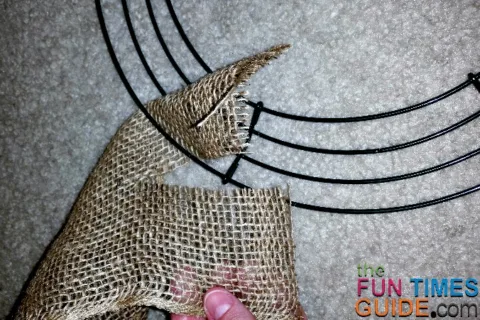
When I’m making wreaths, I like to cut right up the middle of the burlap about 2 inches, using the 2 tails I created to tie it onto the frame – like this:
#2 – Then I used this tutorial to start folding the burlap.
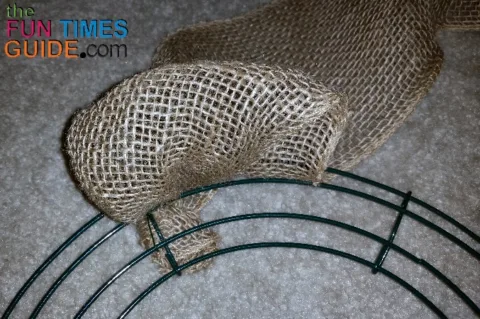
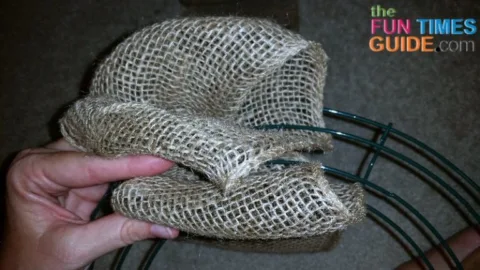
Holding the frame front side up, poke about 2 inches of burlap from the back to the front through the outside opening of the frame. Like this:
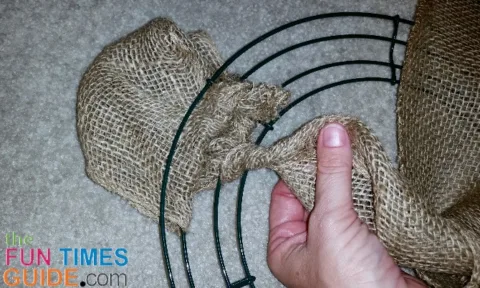
#3 – While holding that loop, repeat that process through the middle and inside openings – like this:
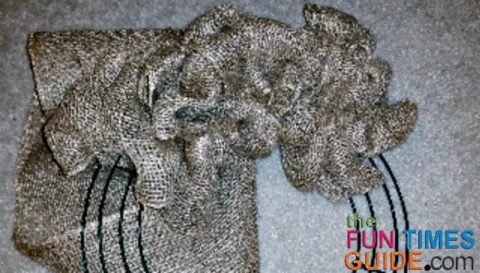
#4 – Now flip the frame over, so the back is now facing you, and twist the burlap 2 or 3 times – like this:
This will help hold the burlap onto the frame, and it eliminates the need to secure the burlap with any kind of wire.
Push your loops tight against the dividing wire on the frame and begin your next set of 3 loops – starting again with the outside opening of the frame.
Once you have 3 loops, again twist the burlap 2 or 3 times.
#5 – Keep pushing the finished loops against the dividing wire – so you can add as many loops as possible. I was able to get 5 sets of 3 loops within 1 section of the frame:
Continue this all the way around the frame.
Some Burlap Tips
A couple of things to note as you’re making the loops:
- You control the size and spacing of the loops. The more burlap you push through each opening of the frame, the bigger your loops will be. So if you want really big loops, go for it! Same if you prefer smaller loops.
- Don’t worry that all your loops be exactly the same size. You will be able to fluff and adjust as much as you want when you’re all done making loops.
- The loops will look like a hot mess as you’re making them — don’t worry about this! I promise they will look fine once you’re all done. After about 9 loops, I looked at my wreath and thought I must be doing something wrong, because the loops were all smashed and topsy-turvy. But I kept going and realized that the key is to get the loops ON there.
When you reach the end of your piece of burlap, tie it off as you did in the beginning and start with another new roll of burlap. I used one full roll and about half of another one. (The size and spacing of your loops may be different, so you may end up using more or less burlap than I did.)
Once all the loops are on there and you’ve tied off your burlap, turn the wreath frame with the front facing up. Look for any section where the frame of the wreath is showing, and adjust the loops to hide it. You can also take this time to adjust any loops that are going the wrong way or need to be fluffed.
How To Add The Ribbon, Seashells & Pearls
#1 – To bring in the elements of the ocean, I used sheer ribbon in teal and turquoise colors. (My ribbon was 5/8ths of an inch wide.)
I cut strips of ribbon about 6 inches long and tied them all over the wreath, making a double knot in the center of the strip. I was pretty random as I did this, trying to spread both colors over the whole wreath.
#2 – Now for the seashells!
The easiest way to secure seashells to the wreath is with hot glue — because it’s a very strong glue and it dries quickly.
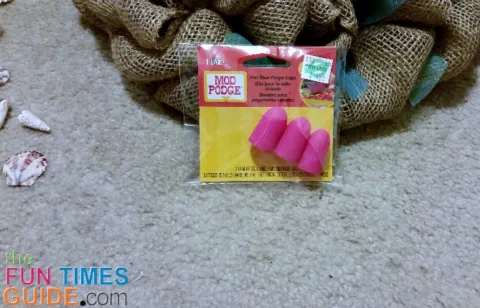
You will need these awesome Mod Podge Finger Caps. Trust me, do not use a hot glue on this project without them!
#3 – Put your shells into piles of similar size and color and choose the ones you want for your wreath. Obviously the lighter shells will work better than larger, heavier ones.
Once again I was pretty random about this. I wanted my wreath to look handmade, so precise placement for any of the decorations wasn’t necessary.
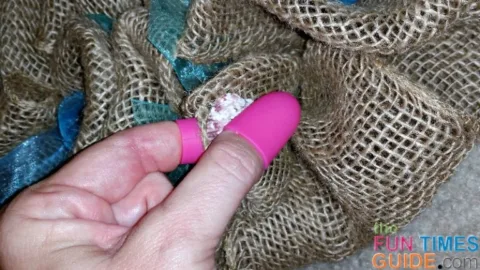
#4 – Put a small amount of glue on the back of the shell, poke your (protected) finger under the burlap at the spot you want to place the shell, and firmly press the shell against your finger with your thumb. Hold for a few seconds.
I found that some of the thinner shells felt really hot on my thumb, so I wore a finger cap on it too.
Most shells are concave (like a bowl) and you might be tempted to fill the shell with glue. My advice: don’t! The burlap will fold right into the shell, and you only need a small drop of the glue to make it work.
#5 – The last step is to add some pearls. I chose 14 cm off-white freshwater pearl beads.
I had some white pearls in my stash of craft supplies, but they were too pure and white against the burlap and next to the shells (my shells are not bleached). The freshwater pearls look a little dirty and add a perfect touch.
To adhere the pearls to the burlap, follow the same process with the hot glue as for the shells – using the smallest dot of glue possible.
Some Wreath Embellishment Tips
I tried a couple of bows on my wreath – I made bows using the teal and turquoise ribbons.
Here’s how to make bows from ribbon.
It turns out that I prefer the rustic, natural look of a burlap wreath without a bow. You might want to try a bow on your wreath just to see if you like it.
Make your burlap wreath personal and unique with any other beach souvenirs or embellishments that you may have – like starfish, sand dollars, and pieces of coral.
Colored pearls are also an option and might add the pop of color you are looking for. Have fun creating your own beachy burlap wreath!

