 Doing arts and crafts with kids can be a fun and rewarding experience.
Often, these are the moments that your children will remember and cherish years from now. When you take the time to help your child make a craft, not only are you creating a keepsake, you are creating a memory.
Beginning to do crafts with your child can seem daunting at first, but it doesn’t have to be difficult, and it doesn’t have to be expensive. Start out with simple projects that you feel comfortable with. Then, as your skills grow, you can tackle more complicated projects.
You can find lots of materials around your house that can be re-used or recycled to become part of your art projects.
Carving out the time can be a challenge too, but when you remember that the time spent with your children could be the most important appointment you keep this week, you may find you have more time than you thought. Schedule it in and hold yourself to it. You will be glad you did.
Here’s a fun idea for one of your first projects together: Make a craft box for all of your art supplies!
DIY Craft Box Instructions
#1 Choose a box.
It can be a plastic bin purchased from a store, or a recycled cardboard box. Above all, it should be sturdy, have a lid, and be large enough to hold your supplies.
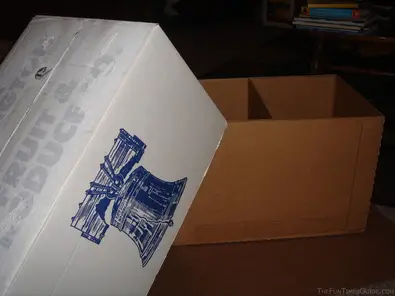
Here’s an example:
I got this box from the produce department of my local grocery store. Since I knew I would be painting the top, I painted a coat of white over the lettering. The darker paints will cover them the rest of the way.
#2 Decorate the outside.
You want it to be special and unique, so use your imagination and encourage your child to use theirs!
Think about using acrylic paint, deco paint pens, hot glue and ribbon or buttons, glitter, plastic gems or sequins.
Younger kids love to have their names on things, so you could paint “Sarah’s Art Stuff” or something similar on the lid.
Try outlining a design in black Sharpie and painting inside the lines for a stained glass effect.
Whatever you decide on, you and your child will come up with a creative and personal container to keep your supplies in.
Where To Find Things To Put Inside Your Craft Box
Now that you have your art box, you need to fill it up.
Remember I said before that it doesn’t need to be expensive? Well, now is the time to be creative.
- An art treasure hunt through the house can be fun and you will probably find all kinds of goodies that can be turned into art down the road. Aluminum foil, scrap cardboard, egg cartons, shoe boxes, ribbon, string, yarn, fabric, glue, tape, buttons, silk flowers, scrap paper such as wrapping paper or colorful candy wrappers all have great crafting possibilities and can be found in most homes.
- Another great option for art supplies is the dollar store. My local store carries fun yarns, foam shapes, glitter, glue, stamps and stamp pads, scrapbook papers, construction paper, scissors, stencils, and lots of other fun stuff. Try checking out your local dollar store before buying from an art supplier as they can get expensive.
- When buying art supplies, start with a few things that you need for a project and slowly add to your collection. There’s no need to break the bank by buying all at once! I do recommend buying some decent quality acrylic or tempera paint in primary colors plus black and white. Get inexpensive but decent quality brushes by buying a variety pack. You can usually find these at stores like Michaels or Wal-Mart. Markers, watercolors, and crayons from name brands will give you much better color than off-brands and are worth a little extra money. Last but not least, consider your child’s age and buy age-appropriate materials. Look for non-toxic labels and recommended ages on the package.
Now that you’ve got your supplies in hand, you’re ready to do some crafting and make some memories with your children.
It’s time for the fun to begin!

