I posted last year about the annual Luminary Night in Brentwood, TN.
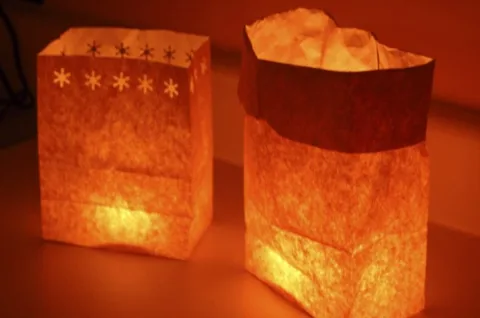
I love the look of a house with perfectly placed luminaries along the street or lining the sidewalk.
The supplies for making holiday luminaries are cheap, and they’re very easy to make.
How To Make Luminaries
Like anything else, people have different ideas of what a luminary should look like.
We can start with the basics, and then I’ll give you some other ideas to help you make yours.
To make the basic holiday luminary, you only need a couple of things:
- Paper Bags
- Sand
- Candles
Now, here are some variations on that:
- Use plain white bags instead of brown. TIP: You can get these around the gift bag section of most stores.
- Use a craft punch to put a design around the top of your bags. TIP: A snowflake punch looks great!
- Can’t find sand in the middle of December? Use cat litter! TIP: You could also place small pebbles in the bottom of the bag.
- Use plastic milk jugs instead of bags. Cut a large hole on one side of the jug and place the candle inside. TIP: Use small tea lights and be sure to take the top off the jug.
- Use large tin cans instead of bags or milk jugs. Punch holes in the jug with a nail and a hammer so the candle light can shine out. TIP: If you have some extra time on your hands, you can even spray the cans with black paint.
A few more (important) things to note:
- Place the bags in your yard away from any other objects.
- Fold over the top few inches of the bag – this will keep the top of the bag from closing over the top of the candle inside.
- After putting out the candles, wait before picking up the bags to throw them away to make sure that the candle wick is completely out.
Cardmaking is my jam! I enjoy using rubber stamps and scrapbooking materials to make my own homemade cards. I use Stampin' Up products for a lot of my cards.


