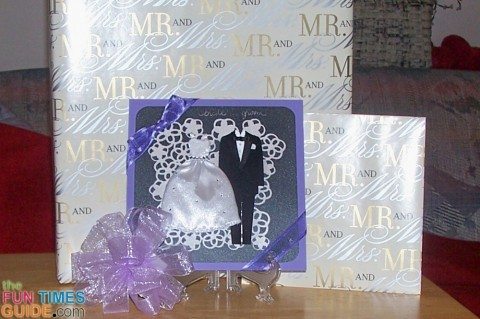
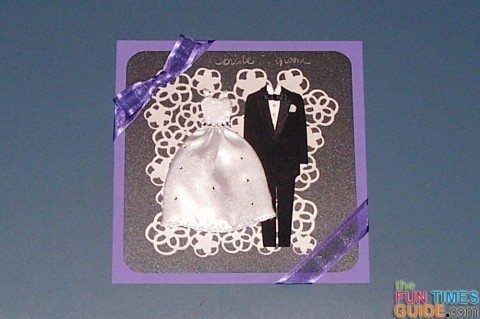
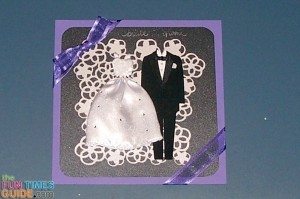
This is a fun wedding card to make!
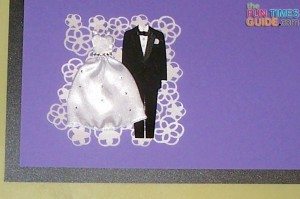
The idea started with some Jolee’s Boutique stickers that I had on hand:
My plan was for this to be a simple card for a purple-themed wedding with just some stickers on paper and maybe a ribbon. That alone would be a cute card!
But… I decided to add a little flair.
Handmade Wedding Card Details
You can see here that the stickers alone are classy and make a nice card.
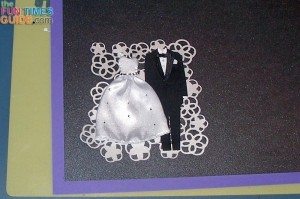
While looking through my Cricut cartridge books, I found a background that looks like a lace doily and decided to see what it would add to my card. The cartridge is Wild Card — an item called Birthday, cut on the Icon setting while in shift, at 5″, on white cardstock.
Back to the beginning…
The Paper
The purple paper is Recollections cardstock, and the black is from their Shimmer collection.
I debated placing the doily and stickers on top of each color and decided it looked better on the black, with the purple under that.
The purple is 6.5″ square, and the black is 6″ square with rounded corners.
To cut the corners, I found a computer disc case with rounded corners and traced them onto the back of the paper.
The Doily
The doily piece looks different on all 4 sides, so I experimented with the placement of the stickers as I rotated the doily piece. Once I found the view that was best for the stickers, I used Elmers Craft Bond, acid-free, multipurpose spray adhesive to keep it in place.
I do a lot of crafts with small pieces using tweezers and my favorite Quickie Glue pen to adhere the pieces. However, this doily piece was too large for that method. I was afraid I would not be able to get the glue on fast enough, before it started to dry.
The spray glue is very easy to use, but you need to be outside or in a well-ventilated area. Place the paper face-down on a scrap piece of cardboard. (I used the top of a shoe box.) Shake the can and spray evenly. Be sure to cover the entire piece, but do not drench the paper. Pick it up by a corner and place it on your card. The directions say that you have 15 seconds to place the paper exactly where you want it. This glue also has instructions for using it as a temporary adhesive: “Let the glue dry for 3 to 5 minutes before placing on your craft, then you can peel it off later.” I allowed the doily piece to set for a few minutes before I added the dress and tuxedo stickers.
Must read: How To Know Which Craft Glue To Use When
If you don’t have a Cricut, you can use an actual doily (paper or otherwise) or a piece of lace. Considering that the Cricut doily has about a hundred little pieces that have to be poked out and pulled off, an actual doily would be easier!
The Bow
The ribbon is from the dollar bin at Joann Fabrics (Wright’s Casa Collection – sheer satin edge violet on a 6 yd spool, 5/8″). You can use any ribbon that you have, in a color to match your theme.
I cut about 24″ of ribbon, found the middle and pinched together 2 loops with about an inch in between. Tie those loops in a knot, and you have just tied the easiest bow ever! To do it yourself, follow the steps described here.
You can also tie a bow the same way you tie your shoes, or any other method you choose.
Once you have your bow, use a pop dot to place the bow in the upper left corner of your card. This will hold the bow in place while you are securing it to the back of the card.
Turn the card over and wrap the ribbon around the back. I used Tombo permanent adhesive tape to hold it down. You can use whatever you like. You will be covering the back with paper, so it doesn’t even have to look pretty. Another option is to place a bow on the top with short pieces that do not wrap around the back. You can leave off the piece on the lower right, or use a small piece of ribbon for just that part — again not wrapping around the back. (This is a good option for using a short piece of scrap ribbon.)
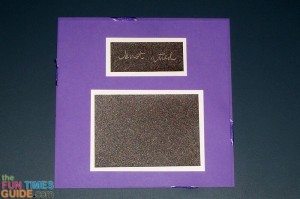
For the back paper, I used the same purple cardstock to cut a piece just a tiny bit smaller than 6.5″ square. Complete the next steps with your sentiment before you glue it down — because it will be easier to write without the bumpy ribbon underneath.
The Sentiment
I used a Pentel Sunburst metallic gel pen in medium point silver to write my sentiment on the card.
After much practice to achieve a casual, free-handed look, I wrote “Bride…Groom” above the right corner of the doily. Using a small scrap of the black shimmer paper (3″x1.5″), I wrote “Knot…tied” for the back of the card.
Of course, you can use any sentiment you want: the name of the bride and groom – words printed from the computer – use stickers – or leave the front plain and just write a note to the couple on the back.
The Finishing Touches
I added border of white cardstock under the black paper and attached it to the large purple square.
Under that is a 3.75″x2.75″ piece of black, also with a white border for my handwritten note.
After you attach that, you can secure the large purple square to the back of your card and you are finished!
For the envelope, I used wrapping paper that matches the paper I used to wrap their wedding gift, using this step-by-step envelope method.
Have fun making this card… and congrats to the happy couple!

