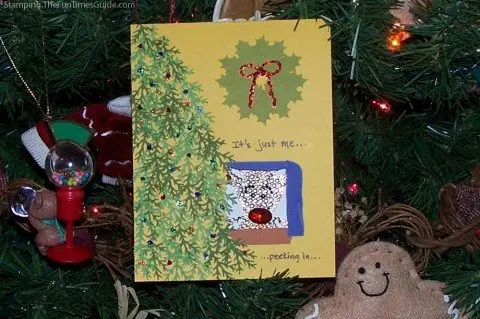
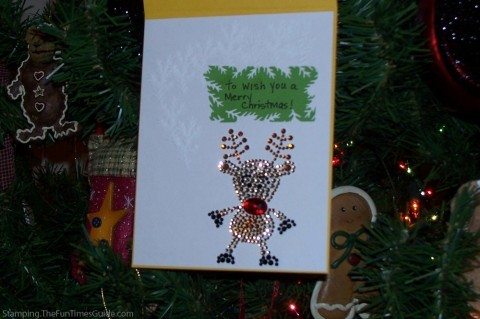
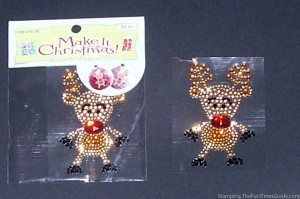
 When I saw this cute reindeer sticker at Hobby Lobby, I knew he belonged on a Christmas card.
I pictured him peeking in on my Christmas day, and now you can too.
The same could be done for any type of character sticker.
I call this my reindeer Christmas peekaboo card…
The Sticker, Punch, And Paper I Used
The sticker is from the “Make it Christmas” section of Hobby Lobby.
My base card is golden cardstock paper from the Recollections jewel tones paper stack — cut to 9×6-inches, folded to open on top.
To make my window, I used the scallop square punch from Martha Stewart’s All Over the Page Punch line.
NOTE: This is a genius punch! It allows you to make a punched hole anywhere on your paper, with no restriction from the usual punch lever. There is a bottom square piece that is placed under the paper. There is a magnet on each corner. The top square part of the punch goes on top of the paper and lines up with the magnets. Then you make the punch by pushing down on the top part. Be sure to have all of this on a hard surfaced table. I was using a card table and that is not solid enough.
I lined up the scallop square with my sticker so there was enough room under the window for my reindeer to stand (on the inside). This worked well when I placed the lower right corner of the punch in the bottom right corner of the card.
Decorating The Inside
Now it’s time to decorate the card.
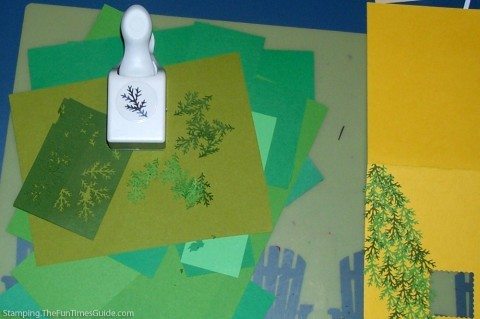
Using scraps of 2 different colors of green, I punched several branches to make a Christmas Tree using the Martha Stewart scary branch punch.
You can make your card better than mine by framing the window first. (I forgot!)
Also using paper scraps, I made curtains and a window box. You can be sure to also make curtains for the left side of the window.
The branches are very delicate, so I used my craft tweezers and Sakura pinpoint quickie glue roller pen to place the branches in a tree shape, mixing the 2 colors of green.
The tree lights are 6 different colors of Stickles glitter glue.
Must read: How To Know Which Craft Glue To Use When
I think the tree is pretty enough that it could stand alone to make a beautiful card!
The wreath above the window is made with holly leaves punched from more scrap paper using the Martha Stewart holly leaf punch. I drew a small circle to use as a guide for placement of the leaves. Red Stickles glitter glue made a good bow for the wreath.
I wanted the inside of the card (or the “outside” scene) to look like a snowy day. I had some extra branches from the inside Christmas tree, so I placed them to look like a forest behind the reindeer.
I was trying to think of a good way to make the trees look snow covered. While I was looking through my supplies, it hit me: just use white trees to begin with! So I punched some white branches and created a snowy hillside background. They are hard to see in certain light, which I think adds to their beauty.
Words And Finishing Touches
Using a fine black Sharpie marker, I added the words “It’s just me…peeking in…” to the front of the card.
To continue the sentiment on the inside, I cut a green rectangle. Using the branch punch once again, I randomly punched around the edges, thinking it might look like it belongs in my forest scene. I used the Sharpie to finish my sentiment “to wish you a Merry Christmas!”
The envelope is made from an 8-1/2 x 11-inch piece of green cardstock, using this method.
I hope you enjoy this little Christmas peekabo card!
More Christmas Tree Card & Reindeer Card Ideas
- Sweet Little Reindeer Card
- Use The Martha Stewart Branch Punch To Make A Wreath
- Happy Holidays: A Cute Reindeer Card
- Make Your Own Fun Christmas Cards
- Martha Stewart Branch Punch Makes Christmas Trees & More
- Peekaboo Card For Christmas
- Martha Stewart Pop Up Reindeer Card
- Happy Holidays: Christmas Tree Card

