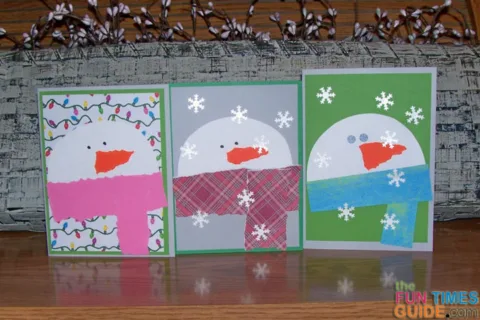
I got the idea for these snowman Christmas cards from this snowman card I saw on Pinterest.
I did a few things differently, coming up with my own cute cards and leaving you with plenty of options!
Here’s how to make these fun snowman Christmas cards yourself…
Making The Snowman Card Base
The basic size for all of the snowman Christmas cards is 4¼ x 5½“, using cardstock.
The next layer is 4 x 5¼“, and the circle of white cardstock is 3¾“.
One of the best part of making a snowman is that the circle doesn’t have to be perfect. I traced around a jar lid and cut it out by hand, then cut it in half to make 2 snowman heads.
The first card I made is the one with lime green on the front, and I learned a couple of things while making it.
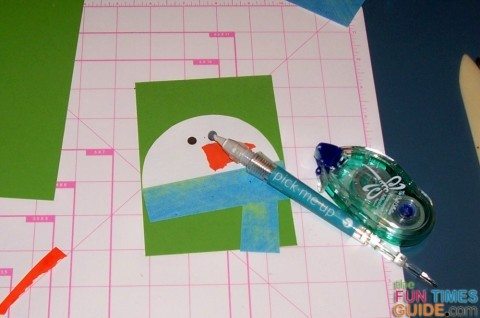
The lime green section is 4 x 5¼”, and I always complete the project on this section before adhering it to my card base, in case I make a mistake. That way I can still use my base card. I secured Mr. Snowman a little higher than middle, and a tiny bit cockeyed.
How To Make A Snowman Scarf
For the scarf, I found a fun blue and green pattern in my paper scraps — from either Michael’s or Jo Ann Fabrics. Look through your paper supply, including your paper scraps, and choose colors that look Christmassy, or just ones that you like.
The Pinterest card uses ribbon for the scarf, and I decided to use paper instead. One reason is I thought it was paper until I carefully read the details. And the other reason is that it’s easier to use paper than ribbon. I also have many more choices of paper than I do ribbon.
For the blue and green scarf, I cut a rectangle 1” wide and a tiny bit longer than my snowman. The second piece of the scarf is also 1” wide, and about 2½” long. Both pieces are cut slightly unevenly, and I placed the dangling piece at a slight angle.
For the other 2 scarves, I tore the scarf paper instead of cutting it, so the torn edges look more like a fluffy scarf. I also think the scarf looks better with the dangling piece on top, which you see in the other 2 cards.
Making Snowman Eyes
The eyes on the green card are made from shiny black paper and cut with a regular hole punch. I used my Silhouette Pick Me Up Tool to grab the small dots. I then held it with my favorite tweezers and used my Sakura Quickie Glue Pen to adhere it to the snowman.
For the other snowman cards, I wanted to try different eyes, so instead of the black punches, I made tiny dots with a black marker. I like both looks, and I love having options!
How To Make Snowman Noses
The noses are the most fun part to make.
Using orange cardstock paper, simply tear them by hand into carrot-like shapes!
Making The Snowflakes
The last thing I did was add some falling snow. The snowflakes are cut from white shimmer paper.
I don’t have any snowflake paper in my stash, so I decided to use my Marvy Uchida snowflake punch. These punches come in several sizes and are super easy to use. There’s a little tray to catch the punches. The one I used for this project is ½”.
How To Make Matching Envelopes
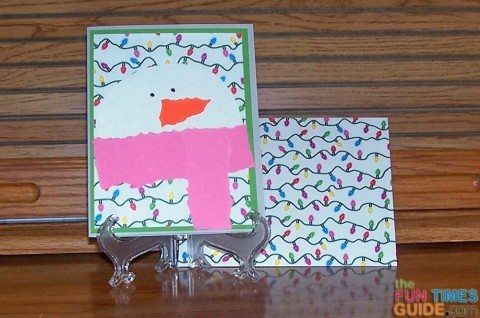
I like to make envelopes whenever I can, and I had enough of the blue and green paper to make the matching envelope.
If I make a big batch of these cards, I’m going to use small paper scraps for the scarves.
Those cards will have envelopes made from the same color as the card base.
Making The Inside Sentiment
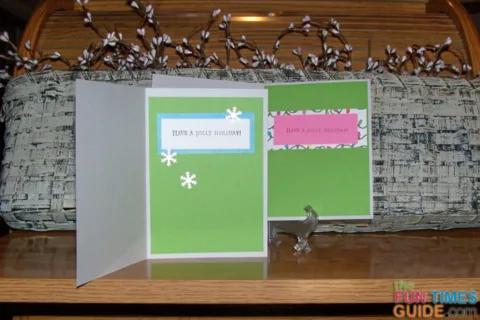
The inside of the card has another lime green panel, the same size as the front.
I used black ink and a Hero Arts Have a Jolly Holiday stamp on white paper for my sentiment, adding it to a scrap of the blue green paper.
Have fun making these cards out of whatever supplies you already have on hand, showing your own style in each one.
Have a Jolly Holiday!

