For a special set of twins, I wanted to make unique cards for their 18th birthdays.
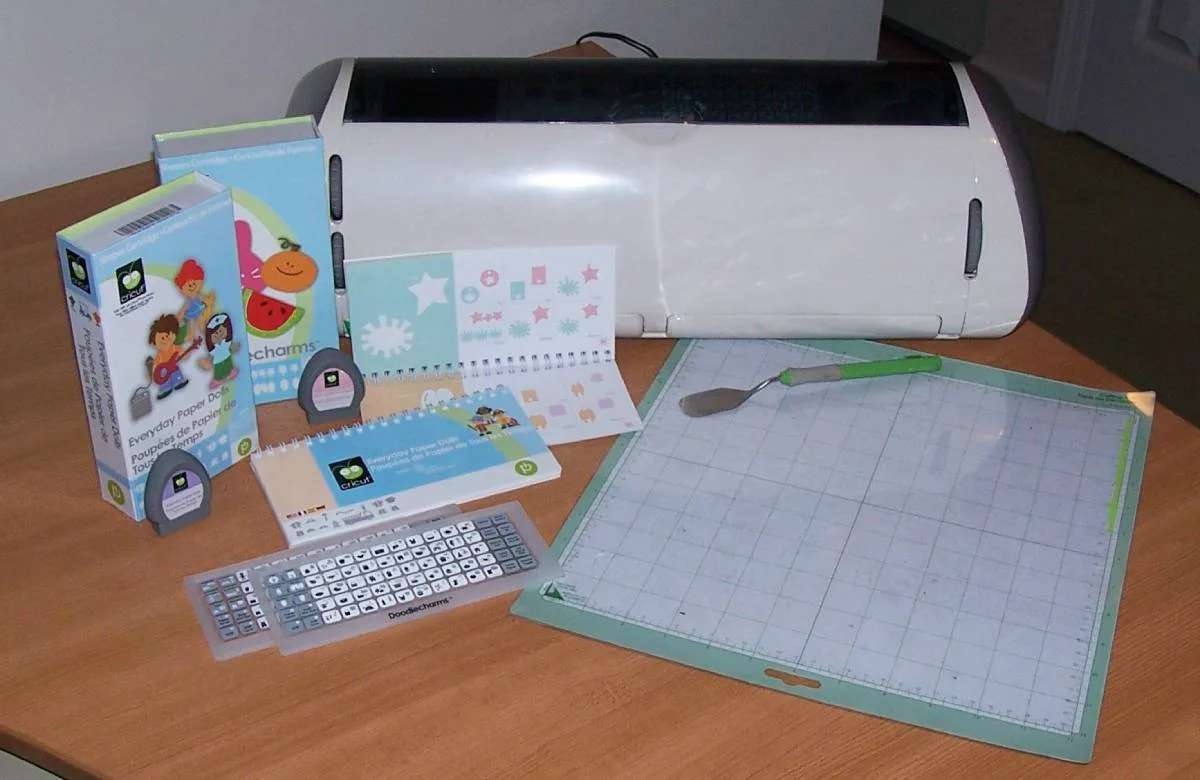
I used my Cricut Expression and Design Studio software.
Below I’ll describe exactly how I did each step. Plus, how you can make this card without either of those tools!
By the way, here’s my review of Design Studio.
The base of each card is created the same way.
One card is black cardstock, and the other is deep blue cardstock.
Start with a 5″ x 5″ square. The numbers themselves are 4-3/4″ tall.
If Using Design Studio…
I used Plantin Schoolbook for both the box and numbers.
- Start with the numbers inside the box, to see how they fit and how close the 1 and 8 need to be. There should be a little triangle of space showing between the numbers.
- Weld the 1 and 8 together. Move them over to the right of the box and weld the left serifs of the 1 to the box.
- Cut out the welded pieces and fold back the square to make the inside of the card.
- Check, to see that the 18 fits all the way inside. If not, you can make the adjustment and cut it again.
- Next cut out the card bases and fold. You will use the 18 without the box to cut several images in the colors described below.
If Doing This Freehand…
You can use your computer to print these images using a text box with thick lines and font style Calibri at size 500.
I recommend printing them once to make a template — because you will need to have the numbers in quite a few different colors of cardstock. If you are more comfortable printing directly on the cardstock, wait until you have created your base card, to make sure the sizing is correct once you cut everything out.
If you don’t have the Calibri font, you can experiment with other fonts and sizes. Just make sure your font will have top and bottom serifs on the “1” and be no more than 4-3/4″ tall.
To make your template:
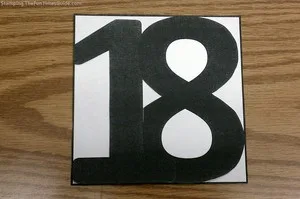
- Start by placing the 8 inside the right half of the box, with 3 sides of the box touching the 8.
- Place the 1 in the left half of the box so that the bottom of the 1 fits exactly inside the bottom left corner of the box. (see photo)
- Slowly slide the 1 to the left until the top of the 1 just barely touches the top of the 8. (If you can see white space between them, it is too far.)
- Use clear tape to tape the 1 and 8 to each other, but not to the box.
- Place a ruler or straight edge along the left side of the box, and mark the 1 where it overlaps.
- Move the 18 off the box, and line up your marks with the right side of the box. Make sure the bottom of the 1 is straight with the bottom of the box and tape the box to the 18.
This is now your template!
Fold back the square to make the inside of the card, and check to see that the 18 fits all the way inside. If not, make the adjustment and fold again. Trace your template onto black and deep blue cardstock for the card bases and fold. You will use the 18 without the box to cut several images in the colors described below.
Decorating 18th Birthday Cards
Now that the cards are cut and folded, it’s time to decorate.
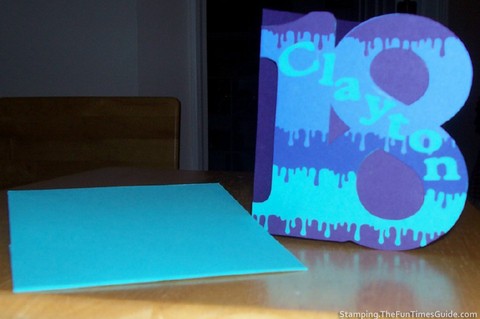
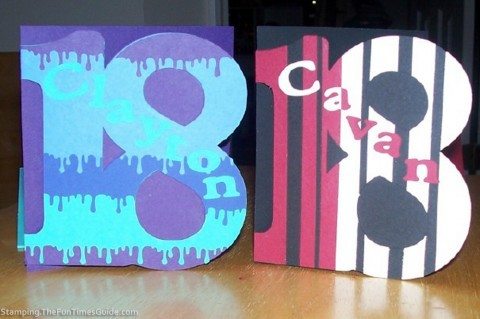
Card #1 = Blues
- You will need an 18 cut from cardstock in each color. I used 4 different blues, which might be difficult to see in the pictures.
- The stripes at the top and bottom match the base color (which I will call deep blue). From top to bottom, the other colors are medium blue, dark blue and sky blue.
- On the sky blue, use the Martha Stewart Drip border punch to cut a strip from the very bottom of the 18. Place it over the base 18, and you will see the base color showing at the bottom.
- Next, use the dark blue 18. Cut off 1-1/2″ from the bottom, taking care to cut a straight line.
- Now use the border punch along that line. Place it over the base 18, revealing the sky blue and base blue stripes. Follow that process with the medium blue, cutting off 2-1/2″ from the bottom before using the border punch.
- Lastly, use an 18 in the base color. Cut off most of the bottom, leaving 2″ at the top.
- Carefully, use the punch to cut drips.
As you can see on my card, the top stripe separated on the 1 and the 8, so I glued each one separately. The letters for the name are 3/4″ in sky blue. I used Cricut cartridge Plantin Schoolbook. You can use any font or style if you are using another template.
Card #2 = Red/Black/White
- You will need one 18 in red and one in white.
- Following the pattern on my card (or creating your own), make vertical cuts to remove thin slices of the 18.
- Adhere the remaining sections onto the black base. Be careful on the 8, as again the top and bottom strips will separate and be very small. I used craft tweezers and a glue pen for the smallest pieces.
- These letters are also 3/4″ in red and white. Notice that I used both colors on the first ‘a’ due to its placement on the card.
Must read: How To Know Which Craft Glue To Use When
Finishing Touches
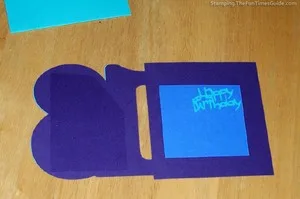
When the card is closed, I wanted it to look as if the holes of the 8 peek into the inside of the card, but I wanted to use the entire inside to write on.
Open the card, and using the base color, place a section that covers the circles of the 8 as well as the little triangle between the 1 and 8, as seen in this photo:
Now you can use the whole inside for your sentiment and personal note.
I used Cricut cartridge Wild Card for both sentiments, cut at 1-1/2″, placed on 3″x3″ squares. You can also use stickers, computer-generated words, decals, etc.I made matching envelopes in sky blue and red.
Walaah!… and there you have your own homemade 18th Birthday cards.
Of course, you can celebrate a birthday of any age using this pattern with any numbers.
Enjoy!
More Fun With Numerals On Birthday Cards
- 18th Birthday Parental Advisory Card – video + instructions
- 1st Birthday Card – another card using large numerals
- 50th Birthday Card – a FUN cake & numerals card
- 3rd Birthday Card – cupcake & numeral card
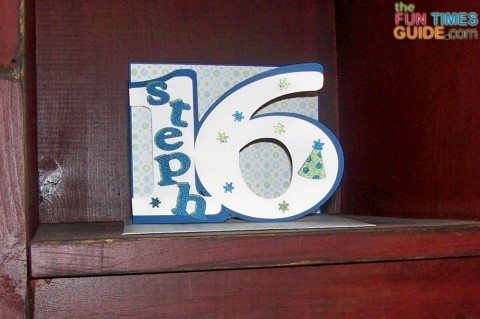
UPDATE: Here’s another version of the same card that I recently made…
I don't buy greeting cards or holiday cards anymore — I make my own! I also do some rubber stamping and scrapbooking. But mostly I enjoy creating handmade, one-of-a-kind cards. I’ve been an avid crafter for most of my adult life. My crafting addiction started with cross-stitching, then moved on to wearable art, projects with painted wood, fabric crafts, and then paper crafts — which has transformed primarily into card making. I also make the occasional wreath, snowglobe, and other holiday crafts.

