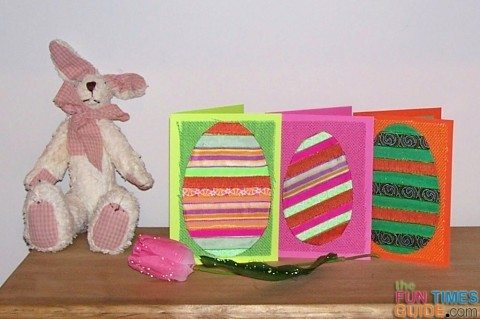
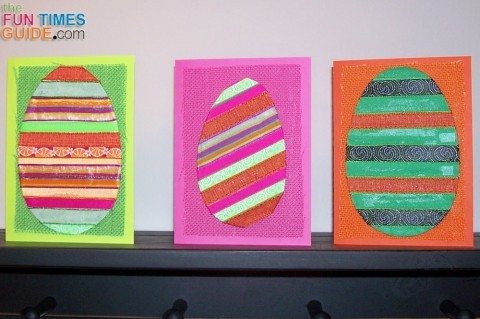
After seeing this card on Pinterest, I was inspired to try the following ribbon egg cards.
I considered using washi tape instead of ribbon, but I fell in love with the $1 ribbons at Michaels and selected a fun variety of colors and patterns. I suppose if I had reached the washi tape bucket first, I probably would have chosen those instead.
See how I made these Easter cards, plus fun Easter card ideas to put your own twist on handmade Easter cards.
DIY Easter Cards
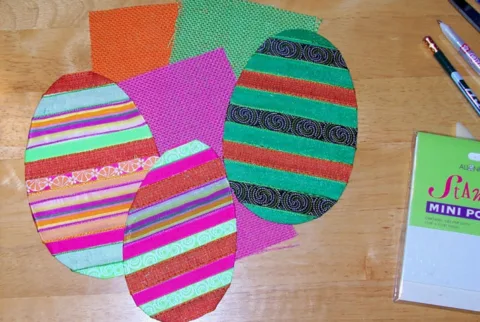
I used white cardstock as the base for my first egg shape, which I drew freehand. (You could also print one from Easter egg clipart to trace.)
Two of my cards use 4×6″ Easter eggs, with one Easter egg slightly smaller at 3.5×5.5″.
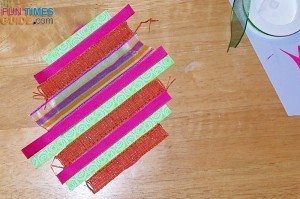
Next I cut 6″ ribbon pieces and placed them in different order to see which ribbons looked good together. Several of the patterned ribbons had a surprise bonus of a solid color on the back, so I had many options to choose from.
Starting with the center ribbon, I used Tombow double-sided tape to adhere the strip of ribbon to the egg, leaving extra ribbon hanging off each side.
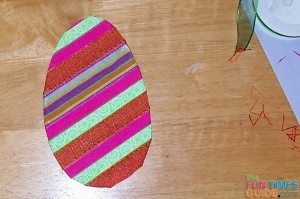
I continued placing ribbons on the egg, keeping each one straight and completely flush with the ribbon next to it. You could also let the base color of cardstock show through to form strips of color. That would give some nice striped dimension to the Easter egg. All of my Easter cards have ribbons covering the whole egg.
I ran the double-sided tape to the ends of each ribbon strip, so I could fold them over and secure them to the back. Do this carefully to maintain the rounded edges of the egg.
After I finished up my first egg, pleased with the results, I set it aside for the night.
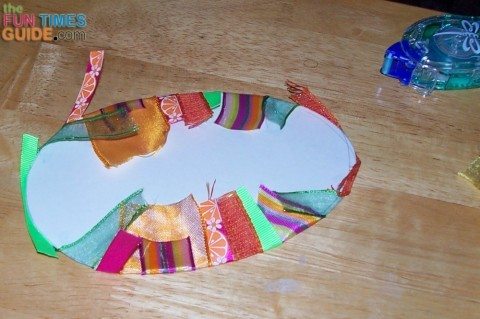
The next morning, I awoke to this:
Ack! Ribbon textures are always tricky to adhere, but I didn’t expect this. Thankfully, this problem was easy to solve since the backs of these Easter eggs will not be seen. Use regular scotch tape to secure all of the ribbon edges to the card.
Another trick I learned is for the sheer ribbons. They look very different when placed on top of various colors of cardstock. I made the next 2 Easter eggs using dark green cardstock and the colors appear different. So play around with the colors if you have sheer ribbons.
It is also necessary to cover the back of sheer ribbons completely with the double-sided tape so you can’t see any tape lines.
Another happy bonus is that the tape behind the sheer ribbon gives a little shimmer, adding a sparkle to the Easter eggs.
As I was leaving Michael’s, I spotted this mat stack of 4×5″ burlap pieces and decided they would add some fun texture to my Easter cards. The colors match my ribbons perfectly!
Each base card is 5×7″, and I secured the burlap with the Tombow double-sided tape.
Next, I used 1/4″ round pop dots to add the Easter eggs to the center of each card. Truthfully, I would have preferred to use larger pop dots — but I wanted to use what I had on hand.
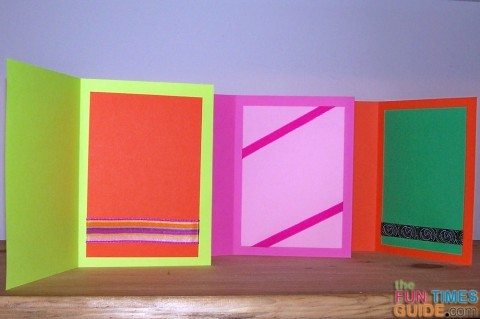
The inside of each Easter card has a 4×6″ piece of color-coordinated cardstock accented with matching ribbons.
I left the inside of the card blank for a handwritten message instead of an Easter greeting. The envelopes are made with matching cardstock.
Have fun making this elegant handmade card with ribbons, and Happy Easter!

