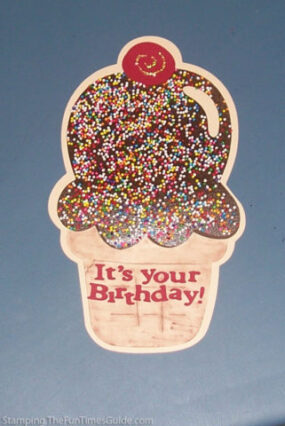
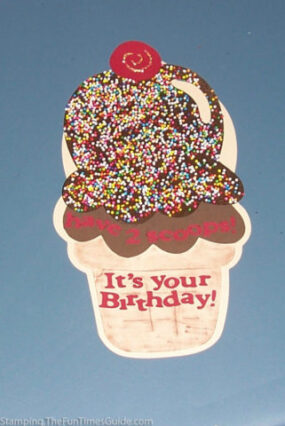
I’ve had an idea for a trick double scoop ice cream cone card, and here it is.
At first glance, it just looks like a regular ice cream cone. Then you pull up on the cherry and — surprise — you see a second scoop!
How To Make The Scoops Of Ice Cream
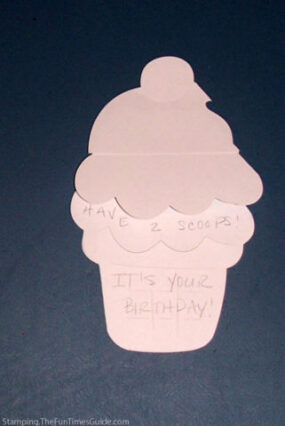
First, I made a test card out of scrap white paper to see how it would would work.
I started with a full ice cream cone on the bottom. Then I made just a scoop — exactly like the one on the bottom — and laid it on top of the bottom scoop.
Using a matching piece of cardstock, I made an accordion fold with 2 folds to connect the 2 scoops of ice cream. It took some practice to find just the right size folds. (Too long, and the top scoop will go below the bottom scoop when it’s closed. Too short, and it won’t look like a separate scoop of ice cream. Once I had it figured out, I cut out all of my pieces.)
I used the Doodlecharms cartridge for my Cricut Expression machine to make the ice cream cone and scoops of ice cream.
I learned from my test cone that the top scoop is a little heavy, since it’s not fully secured to anything (except the accordion fold). To add some strength to the cone itself, I used tan paper to cut 3 pieces at 8 inches:
- Shadow – slightly bigger than the regular cone, allowing for about 1/4″ all the way around (see final card).
- Blackout – exactly the same size as the regular cone without the defining cuts. Scoops are dark brown for chocolate ice cream.
- Regular cone.

Step-by-Step Instructions

1. Adhere the regular cone to the top of the blackout cone BUT do not glue the curvy part at the top of the cone (where the cone and scoop meet – see picture of white practice cone). This slit will allow the top scoop to tuck into it when the card is closed. (I used Tombow refillable permanent adhesive tape). I’ll still refer to this as “regular cone”.
2. Adhere one scoop to the regular cone, again making sure the slit for tucking remains open.
3. Set the 2nd scoop on top of the regular scoop. Slide it up by the cherry and you can see how it will work once the accordion file is attached.
Here is where I discovered a problem with my Doodlecharms scoops. The little cutout at the top right. Once the top scoop slides up, it does not look right as it passes over the bottom scoop and its cutout. So I cut off the top part of the scoop on the regular cone (see picture below). That way, I don’t have to worry about the overlap. You might not have to worry about this, depending on the shape of your cone. If you’re smart, you’ll use just a regular cone shape and not have any kind of cut-out!

4. If your real scoops are the same size and shape as your white practice scoops, then you can use the same size accordion fold for your real cone. If not, then you’ll have to use trial and error again to find the size that works. Once you have it ready, DON’T glue it on yet. Set it aside and we’ll come back for it.
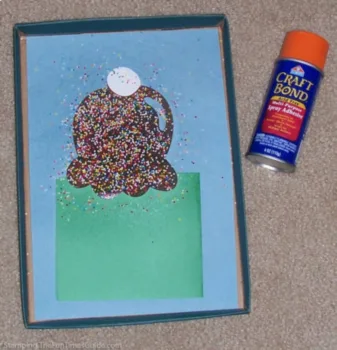
5. Decorate your cone and scoops. I used a brown ink pad swiped on a Q-tip to rub all over the cone. The red letters are all cut from my Cricut (Plantin Schoolbook, 1/2″ roly poly). The sprinkles are real Cakemate mixed Decors, adhered with Elmer’s Craft Bond Acid-Free Spray Adhesive. I used a bottle of Tulip Crystal Sparkles for the swirl on the cherry. There are many ways you can decorate yours. You can use paper that matches your ice cream flavor and use markers to add chips, sprinkles, cookie dough, etc.
6. I did not add my sprinkles until my cone was already fully assembled (argh!!), so I had to shield the rest of the cone from the adhesive spray (see photo at right). It worked like a charm!
7. Now you’re ready to attach the accordion fold to your scoops. Watch the placement to make sure the top scoop slides into the slit that you left available at the top of the cone.
8. Attach the regular cone (now all dolled up with scoops) to the shadow. Make sure the cone is “closed”, so you can line up the entire shape on the shadow.
Must read: How To Know Which Craft Glue To Use When
Final Thoughts
You can write your message at the bottom of the cone or on the back of the shadow. Just remember, some of the sprinkles may make a run for it if you apply too much pressure!
I also made an envelope from a red printed paper following this method LINK TO ENVELOPE INSTRUCTIONS.
Have fun making your handmade ice cream card, and remember: I scream. You scream. We all scream for ice cream!