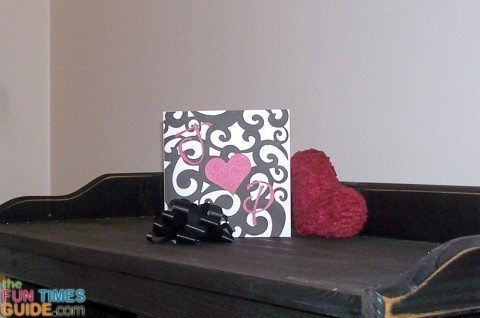
Nothing says romance like black lace, and that’s the look I wanted for this wedding card.
I found a great piece of 12×12″ black lace cardstock at Michael’s. (KI Memories has lots of great die-cut lace papers!)
That was the starting point for my card.
Wedding Card Tutorial
I cut a 6×6″ square of the lace cardstock with my paper trimmer and mounted it to the front of a white cardstock (6×6″ when folded) using a Zig Memory System glue pen with chisel tip.
You have to move quickly to cover the lace paper with glue — so it doesn’t dry before you have a chance to get it onto the card base. The glue is somewhat forgiving, so you can make minor adjustments to the placement if you need to.
Be sure to wipe off any extra glue once the lace is set.
Must read: How To Know Which Craft Glue To Use When
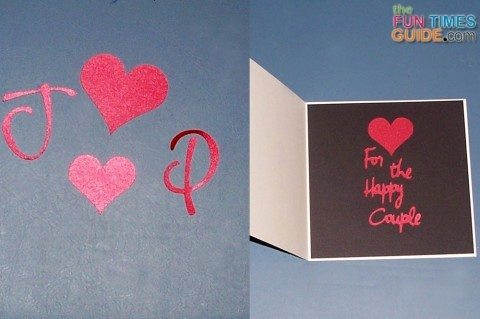
To personalize the card, I used my Cricut Expression to make initials for the bride and groom.
I used red shimmer paper and my Lyrical Letters cartridge. The J is 2″ using the Capitol feature and the P is 2 1/4″ on the Loopde Loo feature.
Each Cricut cartridge comes with a design book, which shows you exactly what every cut will look like. I really liked the Capitol J, but not the P, so I selected a different feature, knowing the letters would look good together on the front of the card.
The red hearts are 1″ and 2″, cut with the Plantin Schoolbook cartridge, also on the red shimmer paper.
For the sentiment on the inside, I used the Wild Card cartridge. Removing these words from the Cricut sticky mat takes patience, because the letters are very delicate. I have also learned that you need to experiment with the size of everything on the Wild Card cartridge, because things are not generally consistent with the actual size.
The sentiment I used is 12″. I used a piece of black cardstock (5-3/4 x 5-3/4″) on the inside of the card under the sentiment.
TIP: If you don’t have a Cricut, you can use stickers or pre-cut die cuts for the letters, hearts, and sentiment.
I used the same wrapping paper that I used for my wedding gift to make the envelope. You can use a 12×12″ piece of paper, but it is very tricky to make it to fit the card. Whichever you choose, follow these steps to make your envelope.
Have fun personalizing this card for your next wedding!
More Handmade Wedding Cards
- DIY Lace Wedding Invitation That Could Be Used As A Wedding Card
- More Lace Invitations For DIY Wedding Card Ideas
- Lace Flower & Heart Wedding Card
- Our Favorite Handmade Wedding Cards On Pinterest


