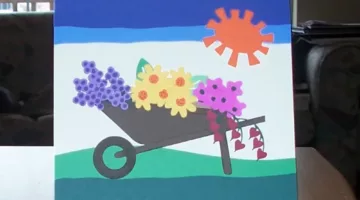
What says spring more than a wheelbarrow full of flowers?!
I decided to use this card as my Mother’s Day card.
It takes a lot of patience to work with the tiny pieces on a card like this. Thankfully, there are some tools that can help you.
Here’s how I made this wheelbarrow card…
First, The Cover
All the flowers, the sun, and the wheelbarrow were made using the Walking in My Garden cartridge from my Cricut Expression.
I cut the blue sky and green grass by hand and glued the pieces to tan cardstock (5.5×6″).
To add texture to the wheelbarrow, I “inked” it with black rubber stamp ink (difficult to see in the picture, sorry). I used Colorbox Petal Point inks — these are easy to use because each individual olor slides right out of the multi-color pack. I just touched the ink pad all the way around the edges of the brown wheelbarrow and the wheel.

I used black and purple Sharpie markers to dot the centers of the flowers.
Using A Glue Pen To Arrange The Flowers
Before I glued down any of the flowers, I played with a couple of different arrangements in the wheelbarrow.
Once I had the one I liked, it was time to glue.
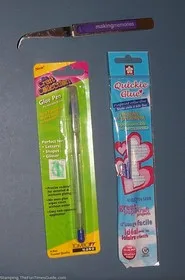
I have 2 favorite glue pens that I use regularly when making cards:
Both are great for working with tiny things!
Must read: How To Know Which Craft Glue To Use When
Using Tweezers To Position The Flowers
Next are the tweezers. I like Making Memories tweezers for card making.

Here’s how I used tweezers to position the flowers on this card.
- I grasped the flower face up with my right hand. Then, holding it in my left hand, I turned the flower over and used my right hand to hold the glue pen and apply lightly.
- With glue on the back of the flower, I took the tweezers back in my right hand and placed it on the card.
- I set the flower precisely where I want it on the card, and hold it down with my left hand, squeezing the tweezers with my right to release it.
I can quickly do a lot of flowers this way — like a little assembly line! Once you’re done, just shake the card a little bit to make sure all of the flowers are secured.
Personalizing The Message
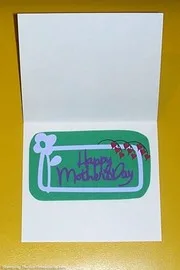
I liked this card so much just like this, so I decided to put my Mother’s Day message on the inside.
I used the Wild Card cartridge for my Cricut Expression machine to cut the phrase “Happy Mother’s Day” and the little flower border.
I had one extra flower from the front, so I added that too.
Making The Matching Envelope
In my paper stash, I found a purple piece of 12×12 paper with some swirls and paisleys that I liked for the envelope.

Here’s how to make envelopes for your cards.

So, happy Mother’s Day to my great mom and all the mothers out there!
Here I am with my mom in a New York City bike taxi. (It kind of coordinates with the card… my mom loves flowers, and we are sitting in a wheeled – um – barrow!!)