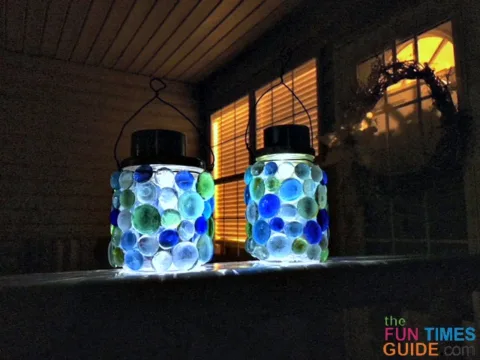
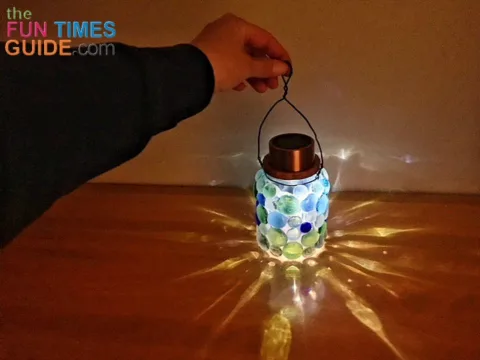
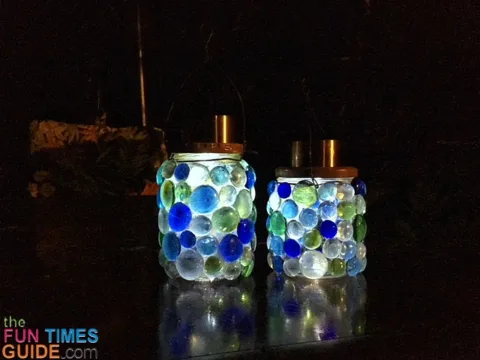
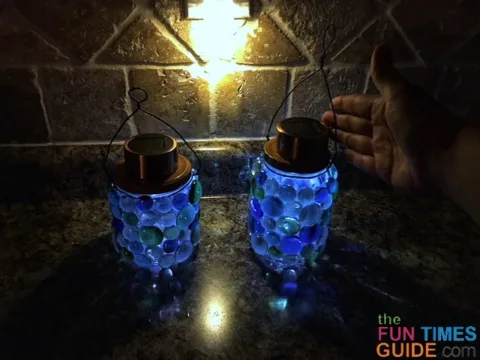
I saw a DIY craft idea which re-purposed old glass jars into tealight candle luminaries.
With that in mind, I decided to explore the idea of attaching dollar store glass gems to the outside of an everyday jar. (I’ve saved glass jars from food — like spaghetti sauce, pickles, salsa, and more.)
I wanted to make some adorable hanging lanterns for our outdoor patio space. But I really didn’t want to use a battery-operated tealight candle — because that would mean using batteries and changing them frequently.
These DIY luminaries are such a great way to use old glass jars. I figured surely I could find a way to illuminate them with solar power. And I did!…
As a bonus: these DIY solar lanterns are completely weatherproof!
My Plan For These Solar Lanterns
My son and I really enjoy using our outdoor space when weather permits. And sometimes during the winter months, our playtime extends into the darkness after the sun goes down.
Our patio area was lacking lights of any kind — because it is quite a distance from a power source.
These DIY solar lanterns turned out to be the perfect solution!
They can remain outside. I don’t have to worry about batteries. And I already had short shepherd hooks in place to hang the luminaries on.
After making them, I realized that solar-powered glass lanterns can actually be used anywhere for ambiance.
Here’s how I made them…
Materials Needed For DIY Solar Lanterns
Here’s a list of the supplies I used to make these solar-powered glass lanterns:
- Glass gems
- Old glass jars with lids
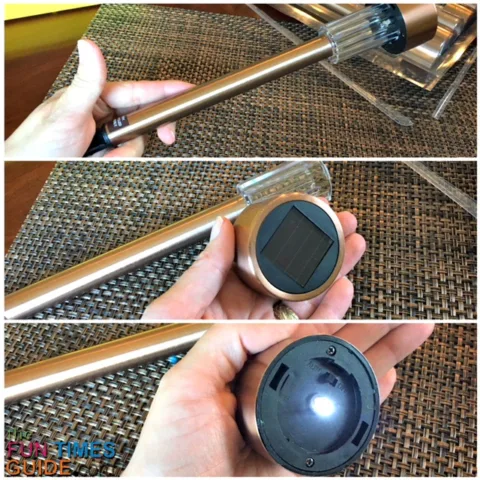
- Solar copper LED path lights
- Clear silicone caulk & caulk gun
- Modeling clay
- Cordless drill & drill bit
- Compass tool
- Thin cardboard paper
- Sharpie marker
- Wire & wire cutters
- Pliers
- Hammer
- Spray paint
- Goof Off adhesive remover
- Pencil
- Scissors
- Hobby knife
- A safe cutting surface (I used a piece of scrap wood and a silicone cutting mat.)
How To Make Solar Hanging Lanterns
These are the steps I used to make my solar-powered glass lanterns:
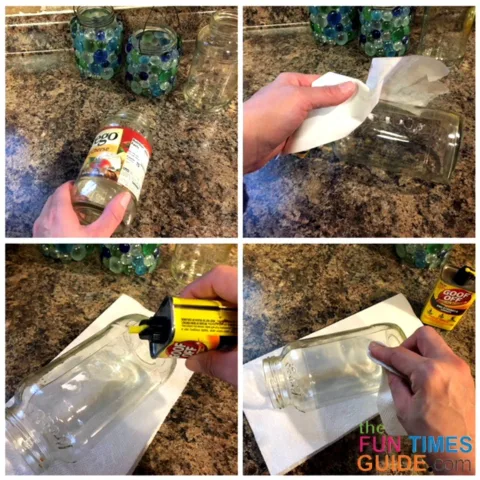
#1 – I gathered my supplies and cleaned any glue residue from labels left on the glass jars.
Here’s how: I’ve found the easiest way to remove glue residue from labels on glass jars is to apply Goof Off to the area, and let it sit for a minute. Then rub in a circular motion with a piece of paper towel. Repeat the process until the jar is clean.
#2 – I removed the cylinder-like solar part from the stake and stem portion of the solar path light — because that was the only piece I needed for this DIY project.
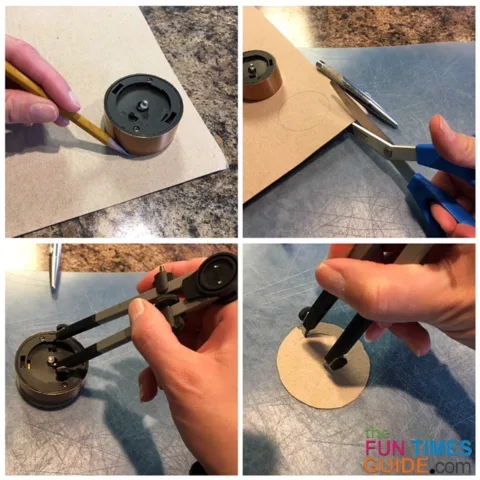
#3 – I traced the solar piece onto cardboard paper. Then, I used scissors to cut out the circle — so I could use it as a template.
TIP: The template aids in the final placement of the solar-powered top onto the jar lids. Since the solar component has a back-up battery, it also has a convenient switch that you’ll probably want to have access to. (I did.)
#4 – I used the compass tool from a compass & protractor set to estimate where the triangular cut-out portion should be from the center.
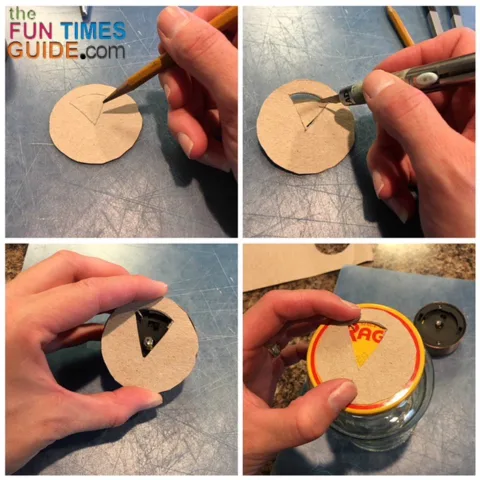
Here’s how: I used the compass to draw onto the circular cut-out. Then, I cut that triangular portion out with a hobby knife. (It didn’t have to be exact or pretty — because I knew it would be covered anyway.)
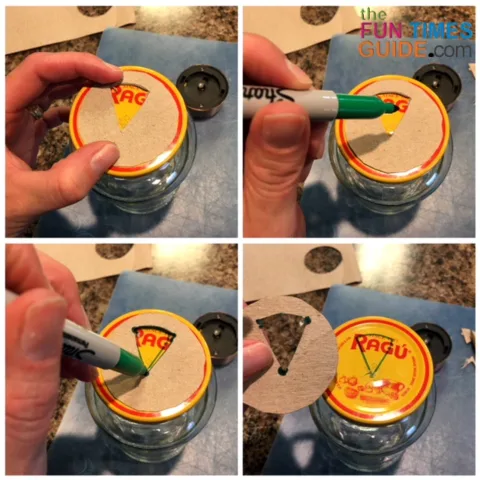
#5 – I lined up the cardboard template with the solar piece — to make sure the hole would allow access to the bulb and the switch. Then, I placed the template onto the jar lid and traced the small triangular hole using a Sharpie marker.
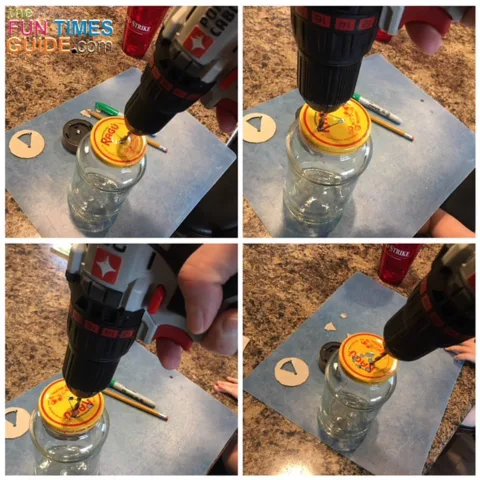
#6 – With the lid still on the glass jar, I proceeded to drill holes on the 3 angles of the triangle — and then another hole in between each of the 3 angle holes.
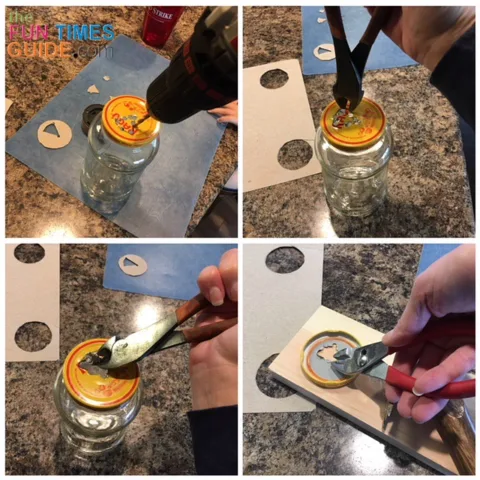
#7 – I removed the lid with all 6 holes in it. Then, I used wire cutters to cut between each of the holes — so I could cut out the triangle excess.
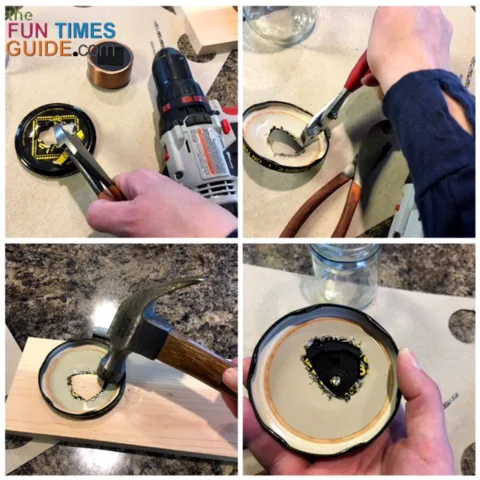
#8 – I used pliers to bend the jagged edges into more of a straight line on the lid. Then, I used a hammer to flatten out the edges and make them less sharp.
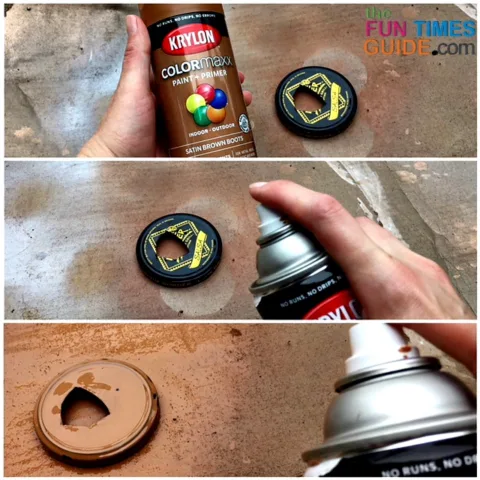
#9 – I applied the first coat of spray paint to the jar lid, then walked away to let it dry.
TIP: I used a “Satin Brown Boots” paint color — because it’s what I had on hand that worked best with the copper solar top.
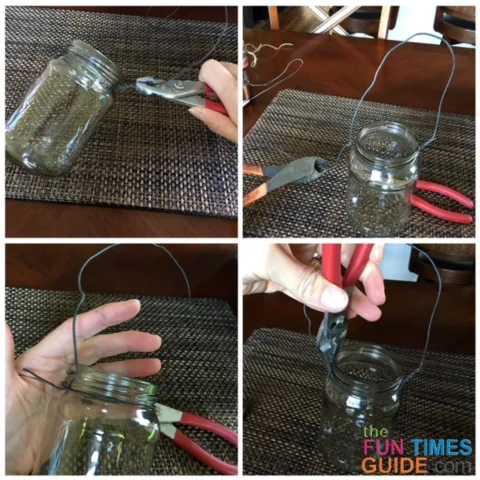
#10 – Next, I made the wire handle for the glass jar.
Here’s how: I wrapped wire around the neck of the jar and used pliers to wind up the tension. I cut the wire where I felt would make the most sense — leaving enough access for the handle to loop through the opposite side. Using pliers, I twisted the other end piece and straightened the handle. To help secure it while hanging on the shepherd hook outside, I added a small loop in the top of the handle by twisting a small section.
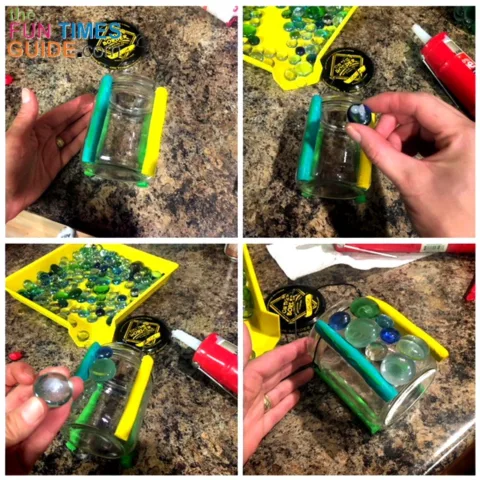
#11 – I added 4 rolls of modeling clay on 4 sections of the jar — pressing it into the glass loosely.
TIP: The clay keeps the jar from rolling one way or the other while you’re adding the gems.
#12 – I got the gems and silicone ready for placement.
Here’s how: I started with a blot of silicone to the flat side of each gem. Then I placed the gem onto the jar. I didn’t really worry too much about gaps, placement, or excess silicone. The silicone does not set immediately — so to begin with, I could only work in small sections at time within the clay perimeters on top of the curve of the jar.
#13 – While I was waiting for the first section of gems to set, I added another coat of spray paint to the jar lid.
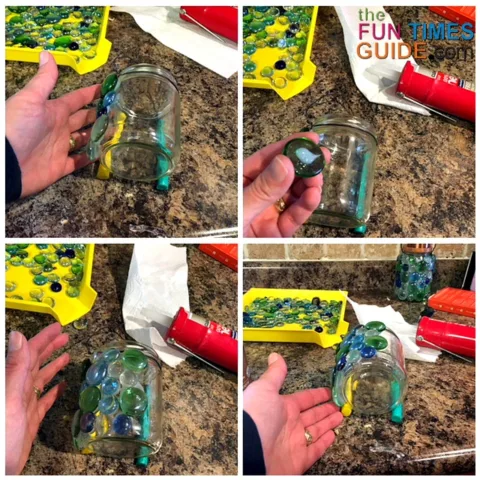
#14 – Once the silicone was set in the first section, I rotated the jar and adjusted the modeling clay — to keep the jar from rolling on its own.
Here’s how: I rotated the jar far enough to work in the perimeters of the already set section to just the the very top of the jar curve.
#15 – While I was waiting for the second section to set, I added a third coat of spray paint to the jar lid.
#16 – Once the second set of gems were set, I did another rotation and worked on another section — repeating this process until the entire jar was covered in gems.
#17 – After the third coat of spray paint was dry, the jar lid was ready for the solar top to be added.
Here’s how: I placed a bead of silicone around the bottom ring of the solar top and then positioned it on top of the jar lid — making sure I that had access to the switch and the bulb through the pre-cut opening.
#18 – Once the jar was completely set (which is a full 24 hours from the time you worked on the last section), it was ready for the solar top.
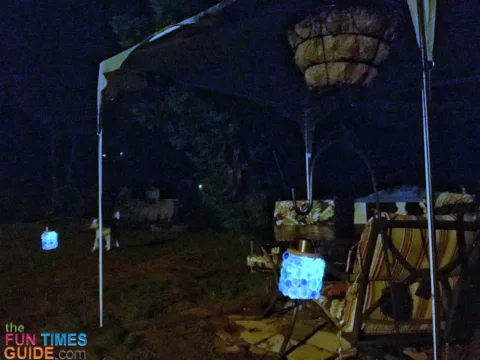
Here’s how: I screwed on the lid and hung my DIY lantern on a shepherd hook outside — in our patio space.
TIP: The switch can stay on permanently — meaning the LED light will stay on for approximately 6 hours once dark, before needing another charge from the sun. Or you can open the jar lid and turn on the switch as needed, with the LED light only working in the dark because of the sensor. Based on my experience with solar lights in the past, I’ve found that they tend to stop charging or illuminating after a few weeks (or months). So I’m going to just use the switch as necessary and see if that method will prolong the lifespan of these solar tops.
The Bottom Line…
I like to repurpose items every chance I get, so this was a neat project to experiment with.
I really enjoy the way the light is illuminated and displaced from the different colored gems. These DIY solar lanterns add a nice ambiance to our outdoor space… and our indoor space too.
Each DIY lantern was a bit time-consuming — due to the wait time for the silicone to set on each section of the jar. And these solar lanterns are actually quite heavy with all the extra weight of the gems.
In the end, these solar hanging lanterns only cost me a couple of dollars to make — because I already had most of the items on hand.
I got the 10-pack of solar copper LED path lights for $20 at a Harbor Freight sale — so each solar-powered lid only cost $2. That’s a great price for an outdoor solar lantern!
Plus, any LED path lights in the set that I don’t use for solar lanterns, I can always use to illuminate our walkway at the front of our house.
I hope you enjoyed this tutorial! I would love to hear about other DIY lantern ideas you have in the comments below.
Here’s a similar tutorial from HGTV to make colorful glass lanterns:
I’m a first-time mom. I work from home and write — mostly about my outdoor adventures, DIY projects, newly discovered products, and helpful tips as a first-time mom. I also like to share details about the alternative choices I’m exploring, as I enjoy this journey called motherhood. My family includes a toddler, 2 stepchildren, 1 dog, 1 cat, and a wonderful husband. My pre-pregnancy life was full of freedom and adventure, so I have a fresh new perspective when it comes to walking away from a career to become a full time stay at home Mama.

