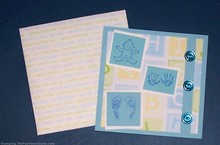
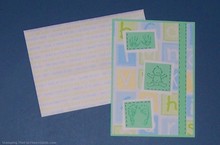
These baby cards were inspired by paper from my DCWV Spring Stack, and my baby-themed rubber stamps.
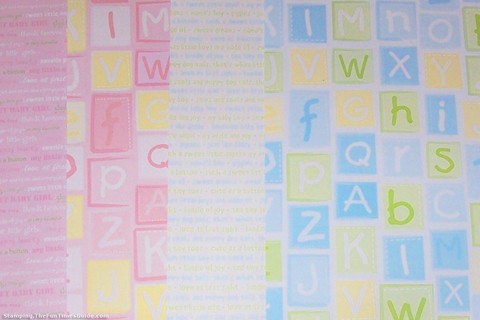
The 2 sheets of paper compliment each other. The one with the ‘baby blocks’ with letters will be for the card, and the one with repetitive baby phrases like “my pride and joy, just like daddy, sweet little angel, cute as a button, snips and snails and puppy dog tails” will be for the envelope.
The Spring Stack has a blue set for baby boys and a pink set for baby girls.
Following are 2 handmade baby boy cards…
Rubber Stamping Basics
I am certainly not the Queen of Rubber Stamping, but I’m happy to show you what I do know.
Basic rubber stamping is fairly simple. It only gets tricky when you try more advanced things.
The stamps for this project are from 2 companies:
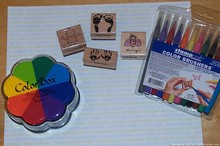
- The baby, feet, and hands are by Stampcraft.
- The blessings angel is by Hampton Art.
Applying Ink To Rubber Stamps
I used 2 techniques to apply the ink to the stamps…
#1 – The first stamping technique is the more traditional method using stamp pads designed for rubber stamps. These come in a huge variety of colors and types. Some ink pads are single-color rectangular shapes, some are small pots of colors, some pads are multi-color.
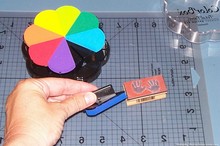
I have a great set of ink pads in one box: Color Box Petal Point Pigment Color Inkpad in 8 pinwheel colors. These are great and easy to use — because each color is a ‘petal point’ that slides out of the box to be used individually. You can then hold this small ink pad against the rubber stamp and dab-dab-dab the color onto the stamp.
You can also hold the pad and use the pointed end to color the stamp, holding the point like a paint brush to cover the stamp with color. That’s how I like to use it, because I have more control of where the color goes. I seem to get less color on the extra part of the stamp (the wooden part holding the rubber part). When color gets on the wooden part, it will sometimes show up on your project.
#2 – Another inking technique is to use a marker to apply the ink to the stamp. You can use any marker, but I recommend those that indicate they can be used for stamping. That way, the ink will be easy to clean off the rubber stamp.
Two sets of rubber stamp friendly markers that I am familiar with are:
Both work well and clean up easily.
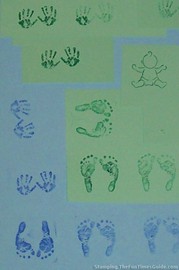 A great benefit to using markers is the ability to use multiple colors on a single stamp — even with very intricate images.
For example, on this project I could have used 10 different colors for the baby feet. I could also purposely NOT ink part of the stamp — like the face of the baby stamp. If I wanted to insert a picture of a real baby, I could leave the face part blank.
Of course, markers can also be used to color a stamped image after it has been stamped onto your paper.
Applying The Stamped Image To Your Paper
When you have inked your stamp and are ready to apply the image to your paper, be sure to use a very hard surface under your paper.
I learned this the hard way. You see, I do most of my crafting on a card table with a plastic cutting mat under my project. My first stamped images were disappointing and I couldn’t figure out why. I checked and rechecked everything — then I looked across my room and saw my wooden card table. Hmm, I wonder… oh yeah, that’s it!
Just like when I use eyelets with my craft projects, the sponginess of the card table’s surface just doesn’t cut it. Once I stamped with the harder surface underneath, I had success every time! It did take some practice to get an image I was happy with, playing with the inking process as well as the pressure on the stamp itself while stamping.
Here are 2 more tips for you:
- Using either the marker or stamp pad method mentioned above, just before you are ready to apply the stamp to the paper, blow a quick breath on the stamp — like a “ha…ha”. This will ever so lightly moisten all the ink in preparation for stamping. Especially if you are using several marker colors, the ones you apply first will dry faster. The quick breath on it will refresh all the ink so you are likely to get a better image.
- Since you never know exactly what your stamped image will look like (perfect, uneven, blotchy, etc), apply the stamp to a piece of paper that you plan to add to your project — rather than onto the project itself. For these cards, my stamped images are on small pieces of paper that I added to a white square and THEN adhered that to my card. Stamping the images directly onto the front of the card itself is risky — unless you will be satisfied with possibly imperfect images.
While I had all of my craft supplies out, I stamped enough images for more than one card…
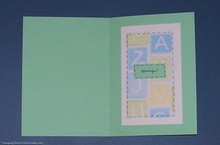
For the first one, I used light green cardstock for my card base as well as background for my stamped images. The card is 5×7″ when folded. The baby block paper was cut slightly smaller and applied to the card front. My 3 stamped images were placed onto white squares — slightly askew, as I did not want perfectly bordered images. Using my black very fine Sharpie, I drew stitch marks on 2 sides of each square — mimicking the squares on the baby block paper. Then I added the stitched green line accent. The inside of this card has a 2.75×5″ rectangle of the baby block paper attached to white cardstock — allowing a little less than 1/2″ border. I used my green brush marker to ink only the “blessings” portion of the angel stamp for the inside sentiment. This time I fake stitched all around the edges.
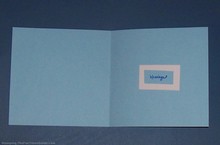
The other card is a 5-1/2″ square of light blue cardstock. Again, I cut the baby block paper slightly smaller for the front. I repeated the method of stamped images on blue paper then attached to white paper. This time I did not add the stitch marks to the squares. On the blue accent strip, I attached 3 blue buttons. The inside of the card is a simple “blessings” stamped on blue, then attached to white.
Both cards have envelopes made of the paper with the baby phrases.
For baby girl cards, you can follow the same process using the pink papers.I plan to make the baby girl cards soon.
I hope these will inspire you to be creative and welcome the new baby in your life!
Other Handmade Baby Card Ideas
I don't buy greeting cards or holiday cards anymore — I make my own! I also do some rubber stamping and scrapbooking. But mostly I enjoy creating handmade, one-of-a-kind cards. I’ve been an avid crafter for most of my adult life. My crafting addiction started with cross-stitching, then moved on to wearable art, projects with painted wood, fabric crafts, and then paper crafts — which has transformed primarily into card making. I also make the occasional wreath, snowglobe, and other holiday crafts.

